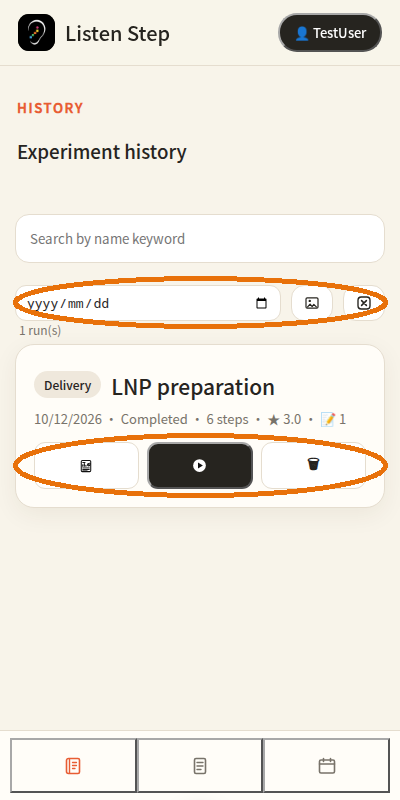
1 · Home & history
The home page lists your experiment history. Use the date picker and the photo filter to narrow records; the ✕ clears both filters. Each record card shows the date, completion status, step count, average rating and note count, with three actions: open the report, resume the protocol, or delete the record.
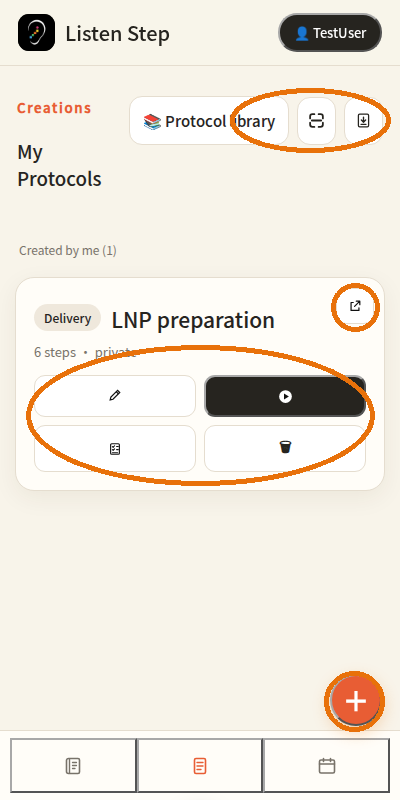
2 · My Protocols
Your own protocols live here. The header row opens the web Protocol Library, the QR scanner, and email import. On each card: the corner arrow shares the protocol as a JSON attachment via email (with the Listen Step download QR in the signature); the four buttons are Edit, Start, materials checklist toggle, and Delete. The orange + creates a new protocol.
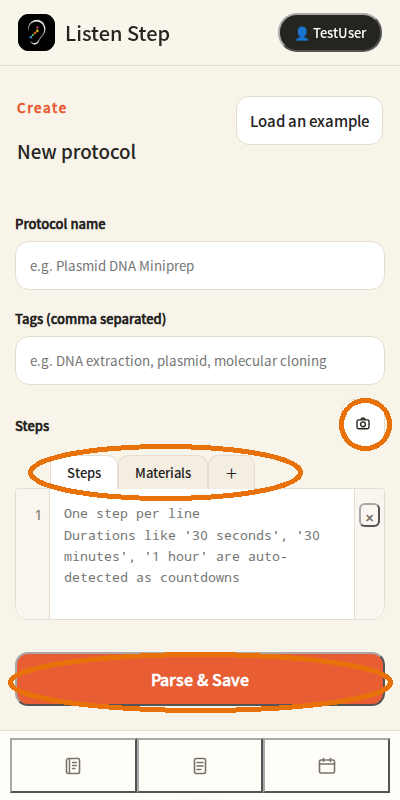
3 · Create a protocol
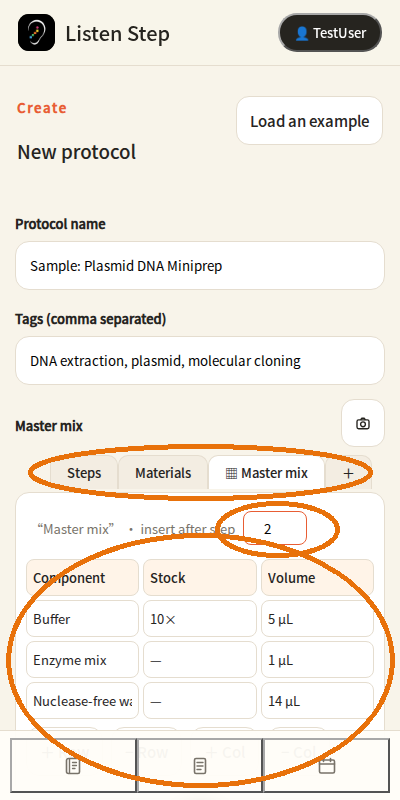
Name, tags, then one step per line. Durations like "30 seconds" or "1 hour" are detected and turned into countdowns automatically. The camera icon photographs a written protocol for OCR. "Load an example" fills in a complete sample, including a table, so you can see the expected format. Tap Parse & Save when done.
4 · Tables (master mix)
Tap + in the tab bar to add a table (default 5 rows × 3 columns, first row is the header). Long-press the tab to rename it. "Insert after step" decides where the table appears in the run (0 = before step 1). Use +/− Row and +/− Col to resize the grid.
5 · Wheel editor
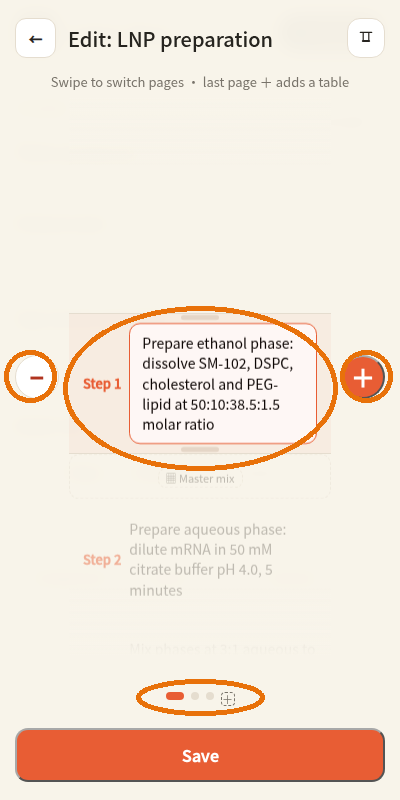
Edit steps in a lyrics-style wheel: the highlighted band is the selected step — tap a row or drag to move selection. + inserts a step after the selected one, − deletes it. Long-press the liquid handle to split at the last comma (pull down) or merge into the previous step (pull up). Table markers (▦) occupy their own row — tap one to select it and reveal ↑ ↓ buttons that move the table within the protocol. The dots at the bottom show the pages: Steps · Materials · tables · +.
6 · Editor table pages
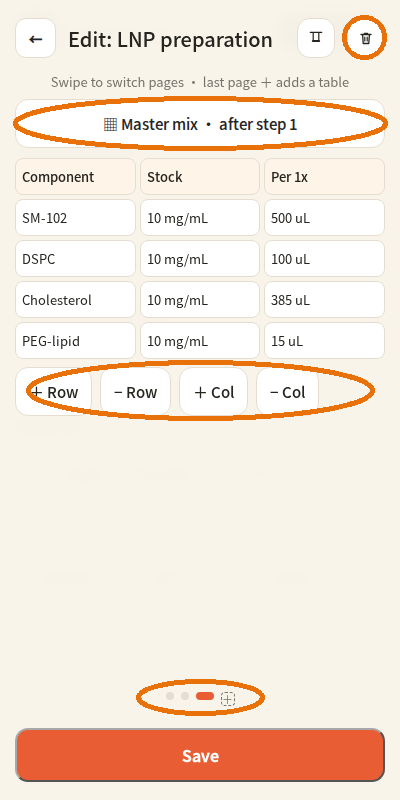
Swipe left/right (or tap the dots) to switch between Steps, Materials, each table, and the final + page which creates a new table. On a table page, the top button opens rename / reposition / delete settings; the trash icon in the header deletes the current page after a confirmation (Steps cannot be deleted; Materials is cleared instead).
7 · Running hands-free
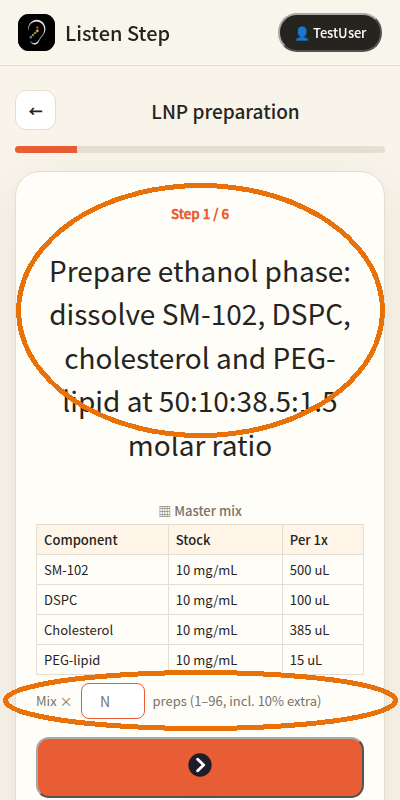
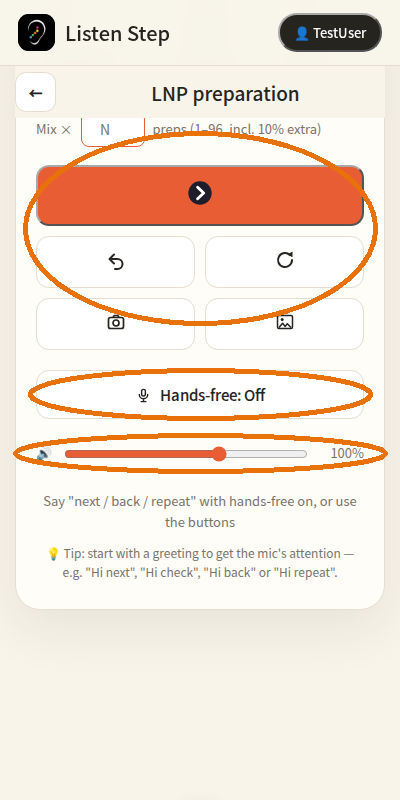
Each step is read aloud. Tables attached to the step appear inline; if the last column holds quantities, a "Mix × N" box appears — enter how many preps you need (1–96) and every amount is recalculated live with a 10% reserve. The scaled values go into the run record; the original protocol is never modified.
8 · Run controls & volume
Big orange button = next step (also "Done" on the last step). Below: back and repeat; camera and photo-picker attach pictures to the current step. Hands-free toggles continuous voice control — say "next", "back", "repeat" (optionally prefixed with "Listen Step"). The slider sets the voice prompt volume from 0 to 150%.
9 · Calendar & scheduling
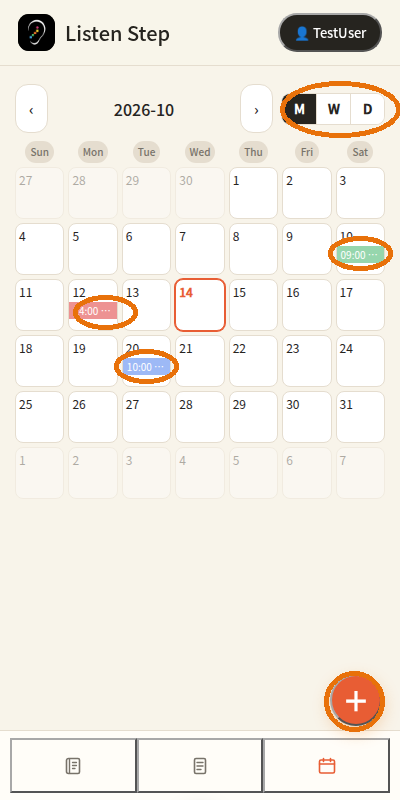
Month / week / day views (the M·W·D segmented switch). The + button schedules a protocol. Blocks are color-coded: blue = planned, red = planned but overdue, green = completed. Tap any block to open that run's report.
10 · Run reports & export
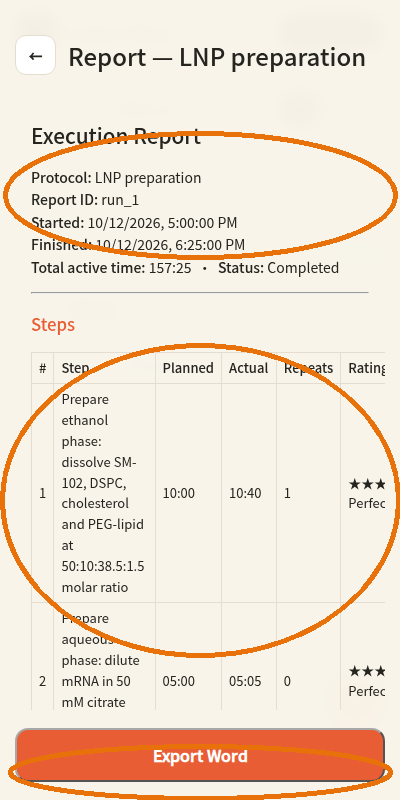
Every run produces a report: summary (dates, total active time, status), per-step planned vs actual times, repeats and ratings, materials checklist results, voice notes, photos, and mix calculations. Export Word generates a document you can open on a PC, or share it as a Gmail draft with photos and audio attached.
11 · Library & import
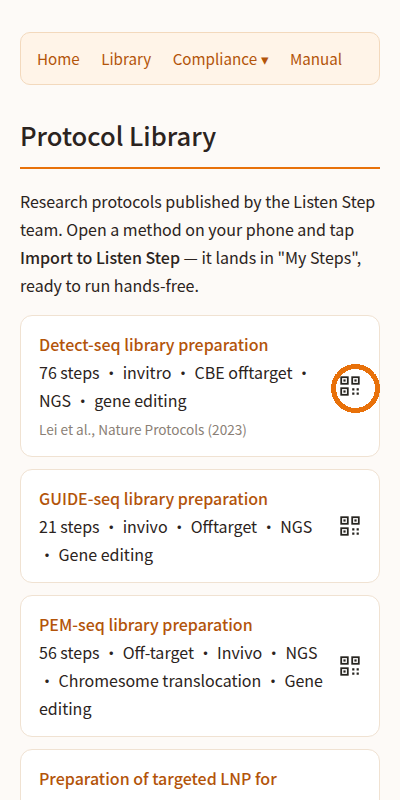
The web Protocol Library lists curated methods. On your phone, open a method and tap "Import to Listen Step" — it lands in My Protocols, ready to run. On desktop, point the app's built-in scanner at the QR code on each card. Protocols also travel by email: the share button attaches the protocol JSON, and the receiver imports it straight from the mail.